Tag Archives: clothes

Top 10 posts of 2013

I thought I would share the posts that received the most views in 2013.  Now that I look back, they all have to do with sewing.  Specifically children’s items.  Interesting.  If you’re into this kind of stuff, hopefully you will enjoy going back down memory lane with me.  The pics will take you to the post if you want to read more about the item (except for update pics).

TEN – Denim Quilt

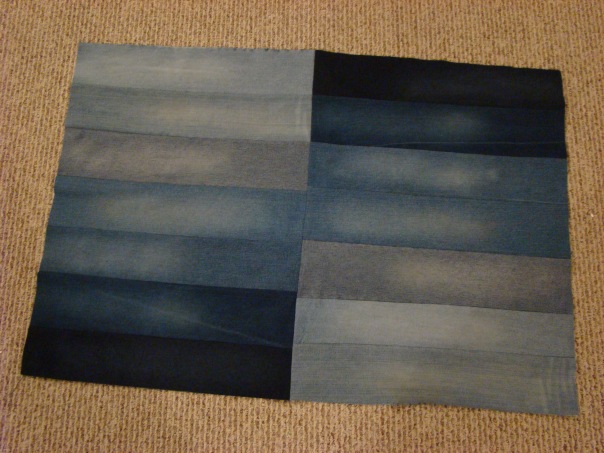
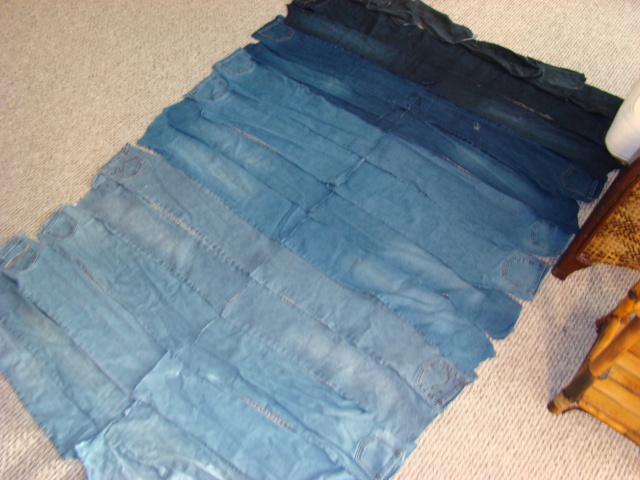
quilt layout

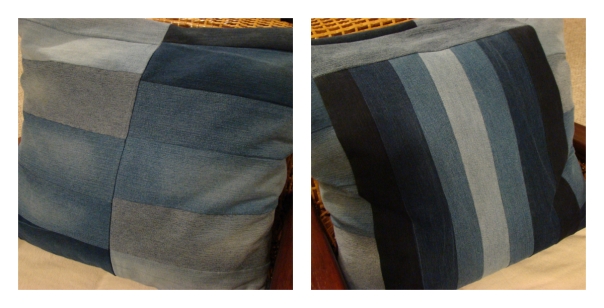
Update:  So, I never made the quilt.  My husband put in a request for a pillow cover for his huge euro, and I thought this denim would fit the bill.  I stayed with the ombre idea and came up with a pillow cover that he is well pleased with.  Each side has a different design.

Before

denimAfter

denim pillow cover

NINE – Fleece pants & t-shirt refashion

collage nautical

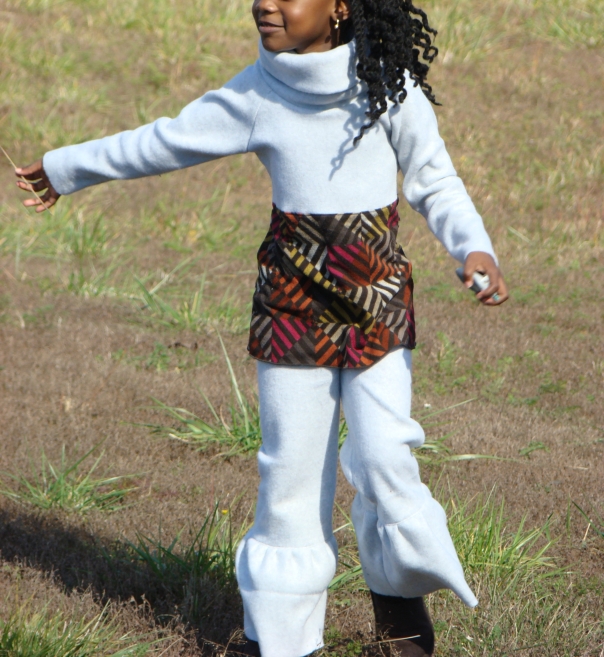
Update:  We I liked these ruffle bottom fleece pants so much, I made another pair for this winter.  I made a long sleeve top with an XL cowl neck and incorporated an old sweater of mine for accent.

fleece pants2

EIGHT – My chocolate drop

av4

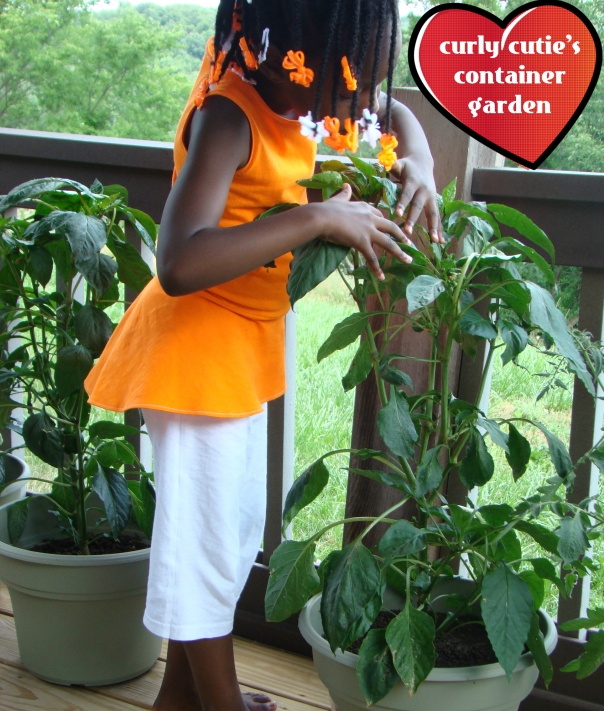
SEVEN – T-shirt refashion (high-lo peplum)

cc4

SIX – Fab collab

pic 79

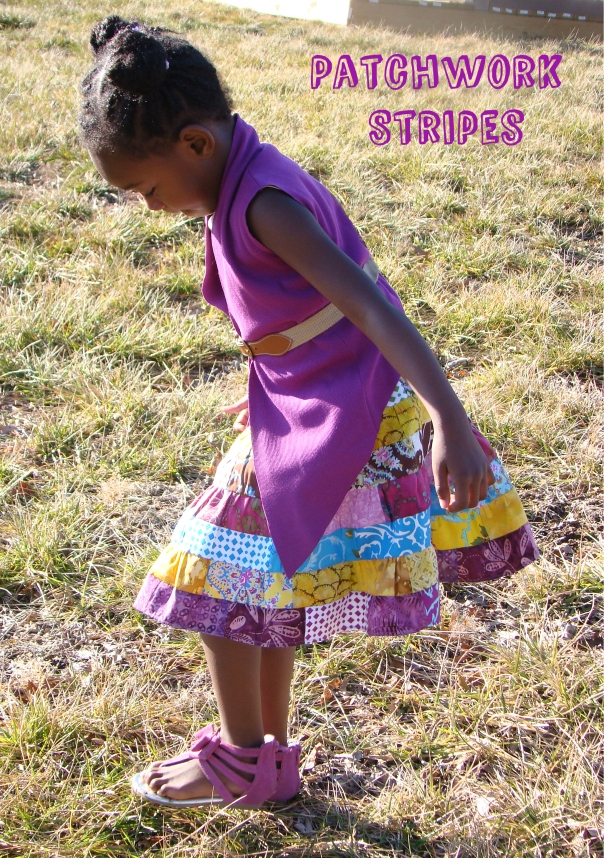
FIVE – Patchwork stripes

patchwork2b

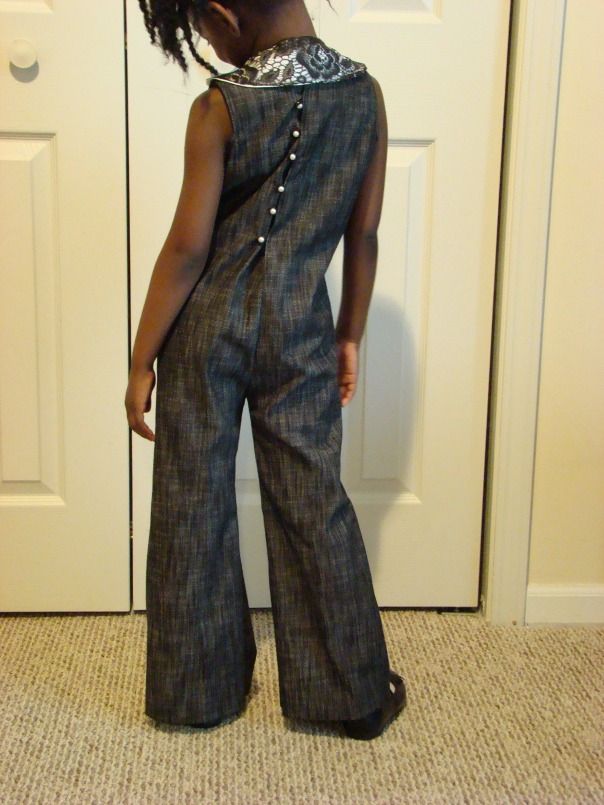
FOUR – Sophisticated romper

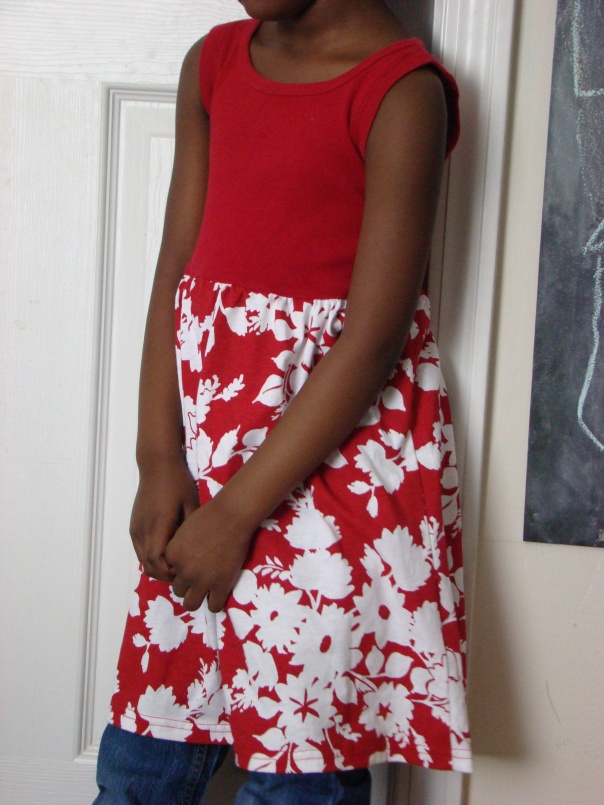
DSC08977

THREE – T-shirt refashion (handsewn edition)

rwfront2

TWO – A gift for Curly Cutie

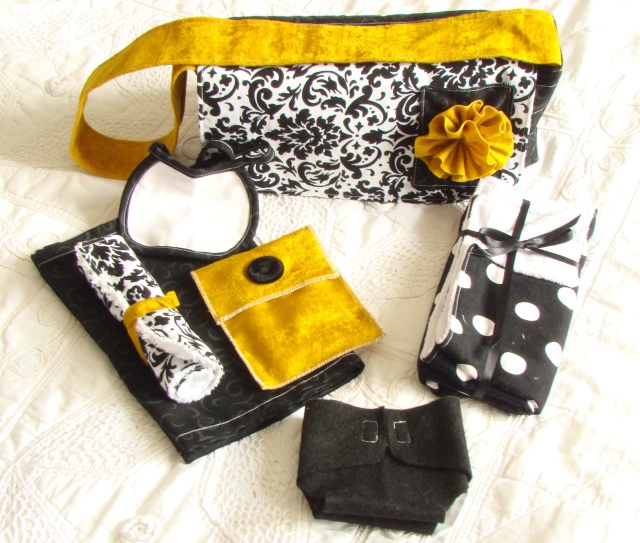
pics 30 045b

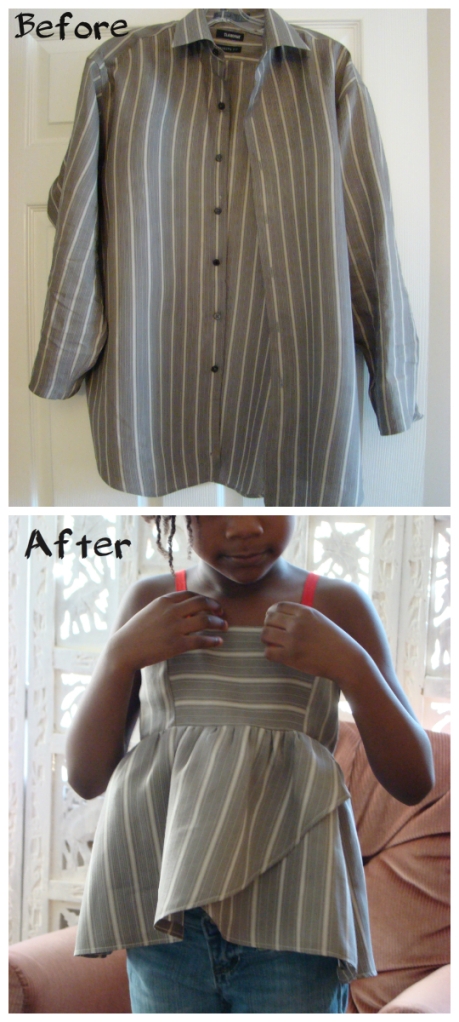
THE MOST VIEWED POST OF 2013 – Men’s shirt refashion

refashion

I’m officially excited for the new year.  Oh what fun this year has in store.

There is a time to dream and there’s a time to walk it out.  I’ve spent this year dreaming.  So  you know what time it is.  Lol!  Who’s with me?

From moo-moo to matron

So, my friend was getting married and I needed a dress.

I would be the only one standing with her and she wasn’t picky about what my dress should look like.  She did make a request that it be strapless and floor length.

I decided to make my dress.  Now, at this point I had only made myself about a few items like a maxi dress, maxi skirt, circle skirt…..you know, the easy stuff.  I had no clue what to do for something more elegant, and the last thing I needed to do was mess up a dress.  My friend was definitely on standby.  She encouraged me to give it a go, and if it didn’t work out, well, we would have been shopping for a dress once I got into town.

It was an outdoor wedding that ended up being inside due to rain.  The color scheme was turquoise and gray with orange accents.  She also wanted her day to have a beach feel to it.  Lots of shells, stones and colored sand were part of the decor.

I thought about making an all turquoise dress until I remembered my Mother-in-law love giving me a moo-moo a while ago.  I realized that the colors were the same as the scheme for the wedding.

moo-moo

It was a bit bold, so I didn’t know how my friend would feel.  I sent a picture over to her and she loved it.

moo-moo3

I was like, “ok, here we go.”  I didn’t have much room for error.  There was no way I could get another moo-moo, so I decided the fabric would be used best as some type of long skirt.   For the bodice I used Simplicity #1606.

simplicity 1606I didn’t have enough fabric for a long semi-circle skirt, so I made it an A-line.   Of course, I made a muslin.  I mean, this thing had boning and everything.  I didn’t know the first thing about it.  Sometimes you just have to jump in and not look back.  I was able to use most of the moo-moo by cutting it right under the neckline.  I used some of the remaining fabric to decorate the guest book.

moo-moo2

Things got a bit difficult in trying to cut the skirt pieces.  It was different from the skirt in the pattern so I kinda had to do my own thing, which would have been ok had I not cut the material a hair to short.  I needed also to account for the back zipper to be put in.  Either way, it wasn’t bad enough to throw the project out, but I did need a solution.  So, here’s the dress with bodice and skirt attached.

pics45 014There was a slight slant of the back zipper to the left side of the dress, and I couldn’t figure out how to remedy that.  I would not be wearing it with that slant, trying to make sure the dress was twisted just right all night.  No sir, no ma’am.  My solution, add a removable peplum belt.

pics45 003As the young(er) people would say, “That peplum is everything!”  Lol.  It was such a welcome addition to the dress.  I was comfortable, felt beautiful, and no one knew that up under it my zipper was on tilt.  Lol.

pics45 005

pics45 009

pics45 011This dress form does not do it service.  It looked really nice steamed and on me.  But hey, this is what I could make happen for the sake of the blog.  And for about $11 (moo-moo = free, bodice fabric = $6, boning = $3, thread = $1.50) and a little bit of my time I’ll take this dress any day.

I thought I could make it with the whole sleeveless thing, but alas I could not.  The night before the wedding I made myself a bolero.  I didn’t have my machine, so it was a hand-stitching type of situation.  I couldn’t believe myself, but I was desperate.  No pic of that, but if I get one I’ll update the post.

I’m starting to see things in a whole new light.  We’re told that we have to do things a certain way……..walk a certain way, talk a certain way, spend our money a certain way.  Who makes up this stuff?  Before I started cooking from scratch (which I don’t do ALL of the time by the way….matter of fact I’m in a cooking rut even now, lol), I could only buy food prepared in some way by others (boxed or fast).  Before I learned how to sew, I could only buy clothing items made by others.  I’m not saying there’s anything wrong with those two things.  I just want to emphasize that my options were limited, and I knew no other way.  It didn’t even dawn on me that I could make my own spaghetti sauce instead of buying it in jars.  My thoughts on our capabilities are changing, and it is becoming increasingly difficult to just go along with what’s normal, because someone says it’s normal.  My normal looks quite different than it did a few years ago.  I’m ok with that.  I’m ok with this journey, and looking forward to dropping even more of the stinking thinking I’ve been accustomed to.

Didn’t plan on the post being this long.  But, hey, if you’ve made it this far you might as well go ahead and tell me something that you do now that, at one point, you thought was impossible.  Or one area where your eyes have been opened, and you no longer see things the way you used to.
My Chocolate Drop

Week #3 of Project Run and Play Season 6 is here.  The theme for this week is a boy look.  So quite naturally I used the tot I have on hand.  This theme was quite intimidating if I may say so.  I had not yet ventured into making clothes for my sweet baby boy just yet.  I am really enjoying this sew along because it’s forcing me to go where I have not traveled.

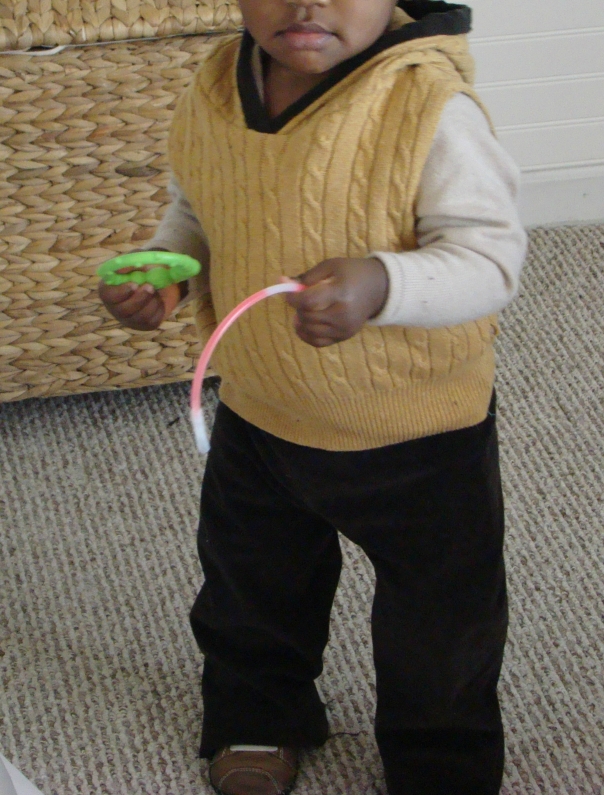
I am all about simplicity, so I decided on a simple sweater, pair of pants, and a hooded sweater vest.  And you already know where my fabric came from.  My stash.

boy look fabric

Golden sweater is 100% cotton.  Tan sweater is a soft wool.  Dark chocolate pants are a stretch corduroy.  AV baby’s outfit is comfortable and moveable.  Just perfect for bringing all his stuffed animals into submission.  Lol!

av5

I ended up using clothes he already wears as patterns.  They seemed to work out just fine.  I definitely knew I needed to make a pair of pants to cover the largeness of his bottom with a cloth diaper on.  We are still going strong.  Well, maybe slightly weakened.  I need to find another solution as this little guy is an extremely heavy wetter.  These diapers just don’t stand a chance for more than an hour.  I digress.  Here are more pics of my guy.

av1

av2 av4

Doesn’t he just look like a little peanut butter and chocolate morsel of goodness?  My husband loathes when I refer to colors as food items.  I’m sorry babe, but I just can’t help it.  Lol.  No matter what color he’s wearing, he’ll always be my chocolate drop!

Fleece pants + Shirt refashion

I finally figured out something to do with the leftover fleece from baby boy’s soakers.  I found a tutorial over at fleecefun.com for some too cute boutique-style fleece pants.

boutique-style pants from www.fleecefun.com
boutique-style pants from http://www.fleecefun.com

I had to make a pair for Curly Cutie.  I used the size 5/6 pattern for her.  She still could have used another inch in length.  Pretty tall one I have over here.  I also opted not to add lace trim around the bottom.

pics37 147b

The pants just sat around for a little bit while I figured out what to do for a top.

We recently said good-bye to our neighbor as she moved out of the neighborhood.  It was definitely bitter sweet.  We did not want to see her go, but we knew the move was a good one for her.  She lived alone, and was getting up in age.  It was such a pleasure getting to know her and her children.  She would often come over and ask if Curly Cutie could come for a visit.  CC loved these moments because she knew yummy snacks would be involved.  I believe my neighbor is the reason CC likes plants and bird feeders today.  She would help watering the plants and refilling the feeders so the birds could eat.

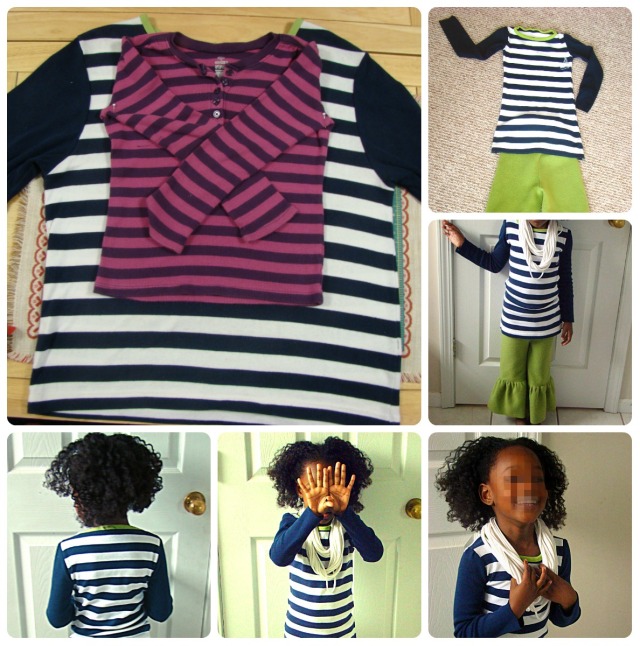
My neighbor’s daughter knows that I sew and offered me several boxes of clothing hoping I could make use of the fabric.  Well, that’s exactly what I did.  I found a shirt in the box that I thought would make a wonderful top for CC’s boutique fleece pants.  It just needed a little tweaking.  I loved its nautical vibe.

collage nautical

CC is pretty much hilarious.  I asked her if I could snap a few pics of her outfit.  She obliged.  She thought it would be a nice touch to grab her upcycled t-shirt scarf for a pic or two.  The bottom-middle pic was taken as she was telling me that she was done taking pictures.  Lol.  That was a wrap.

One day, we plan to go visit our neighbor at her new home.  CC will wear her refashioned shirt, and hopefully she will notice something familiar.

And this is how we’re clothing Curly Cutie the easy way.

Sweater vest into big girl dress

I have had this boys sweater vest in my fabric stash for about a year.

I found it at a garage sale for $1 I think.  When I saw the vest I knew I wanted to turn it into a toddler dress.  I was inspired by this refashion Ashley posted over at Make it and Love it.  She did a fabulous job!

I didn’t nearly have to put in the amount of work Ashley did, because I did not start with a full sized sweater.  Matter of fact, my cuts were two and I was about through.

I chose not to resize the neck area, so all I had left to do was turn this baby inside out and sew.  I used my serger to secure the cut edges.  Wasn’t sure how it would turn out.  I have not worked with sweater material before.  The serger worked like a champ.  It continues to amaze me.

After that, it was ready to be worn by its new owner.  Curly Cutie!

sweater

She cracks me up with the whole “hands on my hip” deal.  It’s been her “go to” pose here lately.  We decided to pair her new dress with a long-sleeved tee, jeans and chunky boots.  And this is how we’re making clothes for Curly Cutie the easy way.

5 days, 5 gifts – Day 5

Start with Day 1 if you missed it.

Well, tis the final day in this series.  The love for handmade items is growing, and I’m glad to be apart of the movement.  This last gift was made for a person I am fond of.  Curly Cutie of course.  When I came across this item, I knew immediately it had to be done.  She would just be so cute lugging it around.  And I knew it was the perfect item to make with the fabric that was given to me at my first rummage sale.  Well actually, a gal saw a necklace I was selling and we decided to do an even exchange.

The fabric was pre-quilted with coordinating fabrics.  Cute girly colors and everything.  No, it didn’t match the black and white set  I made for her big sister gift.  I didn’t care though.  I used a tutorial over at Twelve Crafts Till Christmas for this project.  It took some tweaking since my fabric was already quilted.  Actually, it just made the project that much simpler. 

The Doll Bassinet

You can see the two sides of the fabric.  I’m thinking the inside should have really been the outside.  It is such a fun print.  But I like the dots too.

Here are a couple of pics with her baby in the bassinet.

Never mind that she doesn’t have any bottoms on.  We were doing great for her to have a shirt on in the second pic.  I don’t know what the fascination is with some kids stripping the dolls down and leaving them that way.  Guess who has not recieved a request for doll clothes?  That would be me.  Am I complaining?  That’s a “no”.

It’s so fun to watch Curly Cutie in action.  So glad I was able to make this item for her.

That’s a wrap folks!  Another peek into my beautiful handmade life.

Out of the 5 days, do you have a favorite?  I love them all so, I don’t even think I can pick a fav.  If I had to chose, I would probably go with Day 4.  I wonder what this year has in store.